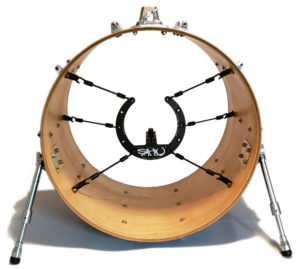
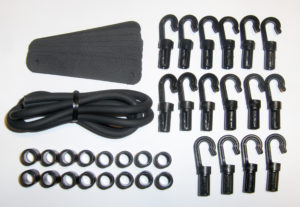
The following pictorial covers our recommended internal installation of The Kelly SHU Pro™ and Shure® BETA 52A® microphone combination inside a standard 22 x 16 inch kick drum shell.
The KELLY SHU™ Microphone Shock Mount can be used with a Shure® Beta 52®A and/or Beta 56®A Microphone. If your preferred microphone of use is the BETA 52A® or BETA 56A®, it is recommended that the internal mounting option be used by following the guidelines illustrated in this pictorial. These quality microphones are quite heavy with a tall profile which work best when supported by the Kelly SHU Pro™ series system and mounted inside the drum shell, finishing as shown at right.
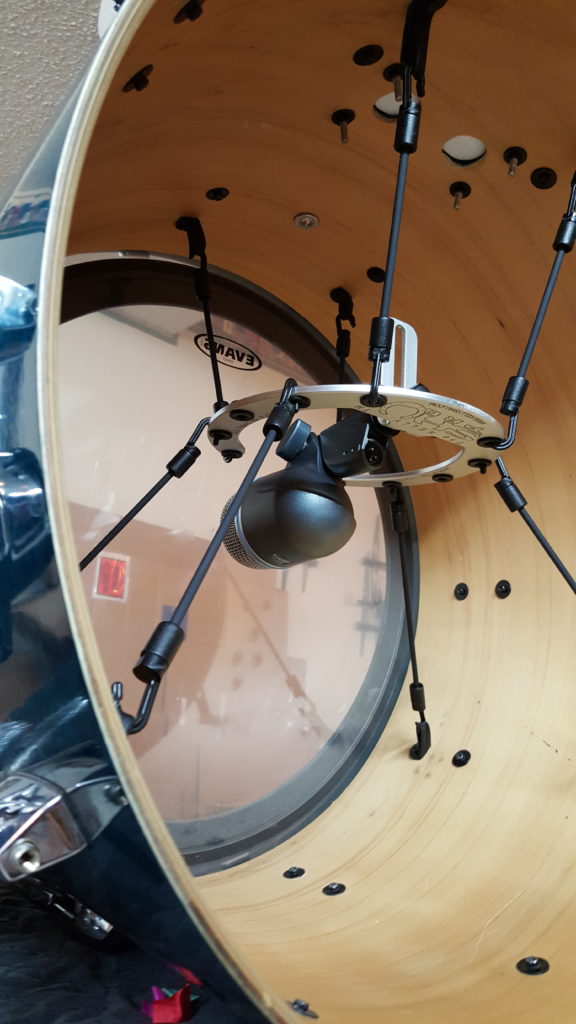
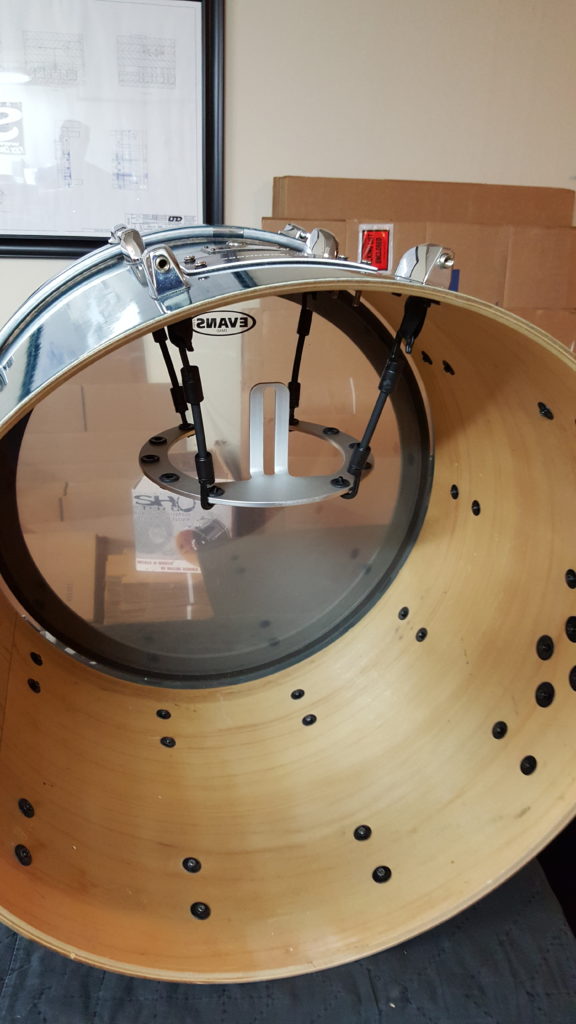
STEP #1 : Install the Top 4 Leathers.
As per the posted photos, locate the top 4 outermost hardware screws of the drum shell and install the internal installation leathers under these screws as per the instructions included with the system. These leathers become your top 4 anchor points for your support cords.
STEP #2 : Build the Top 4 Support Cords.
From the length of supplied solid rubber isolation cord, cut 4 pieces @ 3, 1/8 inches long. Hint: Sharp Scissors work best. Using the supplied hooks and round sleeve parts, install a hook on each end of the support cord pieces by following the instructions included with the system.
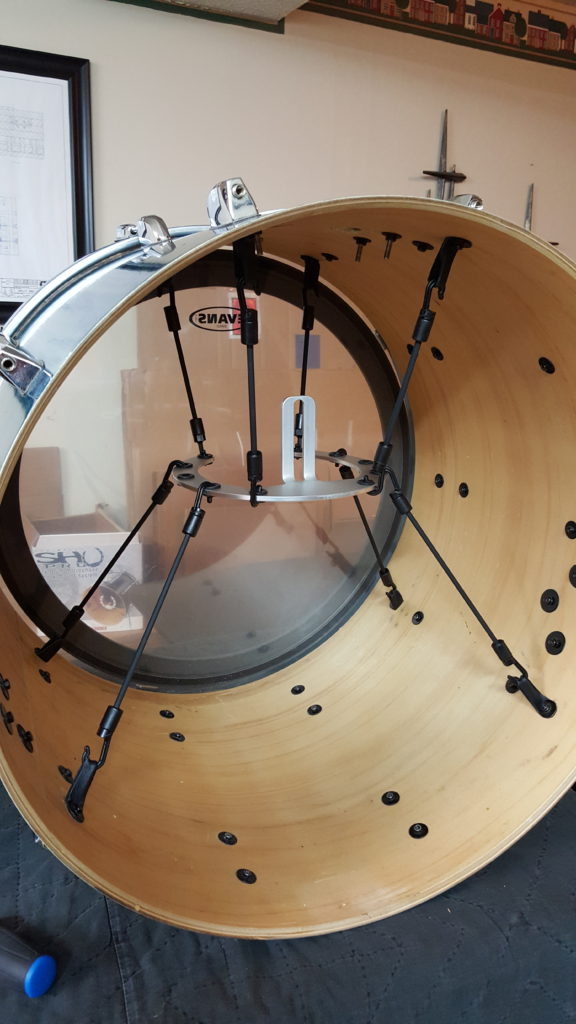
STEP #3: Hang the Kelly SHU™ mounting unit.
Using the 4 support cords you’ve built from the system’s materials, hang the Kelly SHU™ mounting unit inside the drum shell as shown here.
STEP #4: Install the 4 Lower Leathers.
Using the photo at right as a diagram, locate the 4 outermost tuning hardware screws which hold the set of tuning lugs one row up from the ones at the very bottom of the shell as shown here. Install the leathers under these hardware screws as you did before.
STEP #5 : Build the Lower 4 Support Cords.
Using the remaining rubber support cord material, cut 4 more lengths of the material @ 4, 3/4 inches long. Continue the assembly by installing a hook set on each end of these 4 new support cords. Finally, connect the support cords to the lower leathers and any 4 remaining holes in the Kelly SHU mounting unit as shown here.
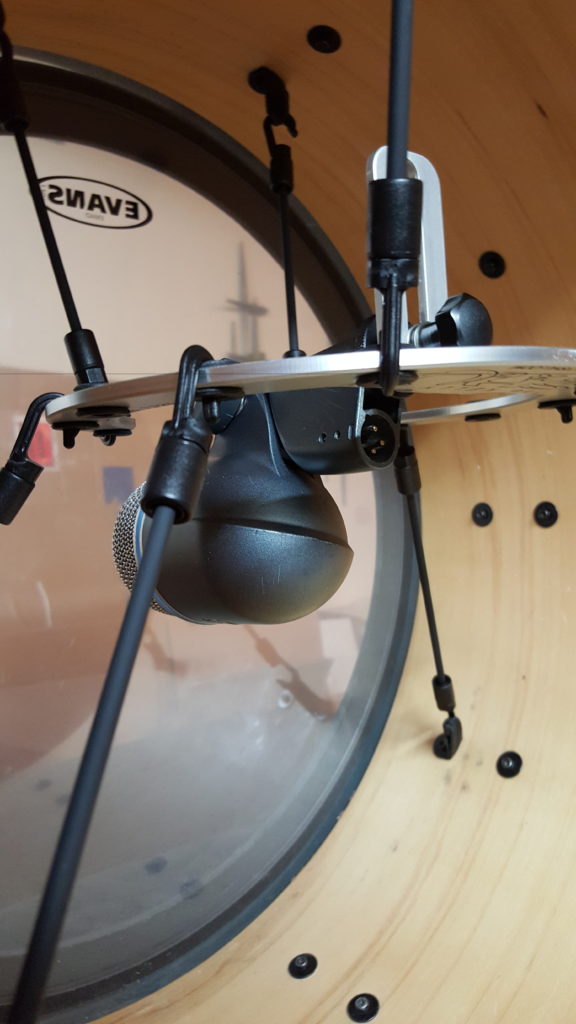
STEP #6: Install the microphone.
NOTE 1: Prior to fitting the Shure BETA 52®A onto the Kelly SHU Pro™ mounting unit, The threaded microphone post needs to be removed from the Kelly SHU Mounting unit. Screw the threaded post into the stand base of the microphone with the keyway slot running parallel to the stand base and locked down by the jam nut.
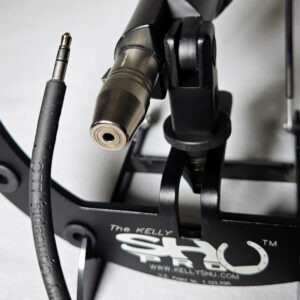
NOTE 2: The microphone must be yolked back 90-degrees to the stand base as we have it here. Doing so allows the connection of the XLR cable to be connected in front of the Kelly SHU™ logo.
ADJUSTMENTS: If a lower microphone placement is desired, the Kelly SHU™ mounting unit may be flipped over 180 degrees from this installation, allowing the microphone to be located on the end of the tab instead of close to the mounting unit. There are many ways to make final adjustments to the installation.
ROTATING THE MOUNTING UNIT and/or AIMING THE MICROPHONE CAPSULE USING THE STAND KNOB are two ways to adjust the microphone’s position, response and polar pattern.
Experimentation is key to achieving your desired placement of the microphone. Once your microphone is settled into its sweet spot, the unit and microphone combination will not shift from position during travel or performance given everything like the stand knob, Kelly SHU™ jam nut and adjustment knob are tight and secure.
We recommend the Kelly SHU Pro™ when supporting large heavy microphones like the BETA 52A, Audio Technica AT2500, EV RE20 and so forth. The Kelly SHU Composite™ series system is compatible with the above mentioned microphones however the rigidity of the Pro’s aluminum mounting unit is proven much more supportive. If the Kelly SHU Composite™ unit is used for these heavy microphones, it is highly recommended that you keep the threaded post and weight of the microphone close to the mounting unit instead of out on the far end of the slotted tab.

